Embroidery: 101
The machines of today allow almost anyone can create amazing professional customized gifts in a jiffy.
Machine embroidery allows for one to be creative to any level. No matter the artist you can create original masterpieces right before your very eyes in minutes to hours, not days or months.
So how do we begin this adventure in embroidery, I mean we have seen it and when we see how it’s made I guarantee you will fall in love.
First, let me start by saying there are two types of embroidery:
Hand embroidery and Machine embroidery.
This article is geared toward the machine embroiderer.
The first question you must ask yourself is simple, Yet most people forget this, the biggest question to ask yourself. “What is it that you would like to embroider?”
What’s the ultimate goal of your embroidery design dreams?
The item that you would like to embroider is going to drastically change your options in which embroidery machine will be needed.
For all my “baby” people out there, meaning if you want to embroider something flat and small as in baby bibs, simple.
All you will require is a small hoop,(4×4, or 100mmx100mm) with a flatbed embroidery machine as opposed to a free arm embroidery machine. Something like the baby lock Sophia2.
If monogramming a tote bag is what you have in mind, them you will require a free arm embroidery machine. These machines allow for the tote bag to be embroidered on just one side of the bag leaving the back on the bag untouched. If attempting this with a flatbed you will end up sewing the front of the item to the back and it turns into not a very good tote bag.
If you want to embroider baseball caps this will need a different machine attachment indeed. Ball caps will require a free arm like the tote bags as well as a cap attachment. This is the hoop, or holder for the cap blank itself. This moves with your machine to get the desired embroidery design perfectly stitched into your cap. Keep this in mind for your accounting as to what it is you will need. Cap attachments are not the least expensive attachment.
So before you go buy a machine that will not complete the vision in your head, ask yourself what it is you are trying to create. What need will you have for this project?
Can you reach the back of the project with ease?
Is this going to be small or large?
Will I be making a large quantity of these items?
Do I want to embroider on a specific item type or material?
Make sure that your desired machine will even be capable of meeting your needs.
Now that we have answered the question of what we want to do, the real question of how big of a field would we like as our maximum in a single hooping.
If you find yourself double blinking at me with too much jargon…
How big do you want your picture to be, easily?
For many of us this will be the biggest embroidery machine decision we make. Options start as small as a 4×4 (smaller hoops are available for tiny projects) and go up to 15×10. They also make extra long options for quilting borders.
All sizes of machine will do the general job of stitching out the millions of free machine embroidery designs that we all want them too, this is all about maximum size. It may take a workaround to make bigger pieces with a smaller hoop and multiple
How large do we want or need to embroider is easy to figure out for yourself.
Step One
Think of your desired project. Is it something like monograms and baby names, small, compact? Or are we talking wall hanging and full embroidered pillows?
I started dreaming big! I wanted to do the biggest and the best! The only problem was my budget was not the biggest and the best.
Step Two
How much can/do you want to spend?
Don’t know where to begin?
I recommend starting small, but do make sure it is as large as you need and, more importantly, can afford. There are always, I repeat, always workarounds to getting the biggest, most outrageous projects out of the smallest of machines.
Now we have chosen our maximum hoop or design size. Great, all done with decision making right? We can buy our machine.
Wait, but now we are hearing multi-needle, and single needle!?!?
First of all, if you are truly a beginner then start with a single needle unless a multi-needle is given to you.
Single Needle Embroidery Vs. Multi-Needle
So what is a multi-needle machine vs a single needle machine? Why could you possibly need more than one needle? Well a single needle is just that, a machine with one needle that holds a single color of thread at a time.
What this means for the embroidery artist is that if you have a design with more than one color, your embroidery machine will need to stop and be rethread for each color change.
For example, if there are 30 different colors in our design that would be 30 different color changes. 30 times rethreading the machine. So the ease of re-threading your single needle embroidery machine is also an important factor for consideration.
A
Why a Multi-Needle Machine?
Well, the purpose for this is to hold more than one color of thread at a time without having to do the rethreading process after every color change. This saves us time. Giving us more time to prepare the next step of the process meaning more projects successfully completed in a shorter time span.
More needles and colors means the
So if we have a six needle machine, as one example, and our same 30 different color thread embroidery design, we go from our previous 30 rethreads down to only 5! So anyone can easily see what a huge time saver these machines can be!
The
It has also seemed to be a recent trend for the companies to attempt to out so one another. Ever growing with the number of needles their top of line multi-needle machines.
So really the sky’s the limit. Between time and technology, we will certainly continue to see advances every year in the sewing world.
Now of course, needless to say, the multi-needles are amazing. However, I don’t want to get anyone’s hopes up for they are certainly not what one would call cheap.
This doesn’t mean that they are only for entrepreneurs. I do highly recommend them more for the small business than just the beginner by any means.
Let’s
So now that we have our first single needle machine, congratulations!
Our new embroidery machine is happy and home with us. You go and pull out the directions only to realize that they are referencing things and gadgets you have never heard of before. Hoops and stabilizers, densities and pouncing!!!! The mind goes on a tangent. What could it all mean! It’s like they are trying to speak to me.
Don’t worry!
You are in good company, for there was a day where we were all there, in your shoes.
Getting to Know Your Embroidery Machine
First, let’s check out this crazy thing and get acquainted.
Our machine, it comes with an embroidery bed.
This is the large thing that slides on and attaches to your main machine. The main machine holds the thread and their needle. When attaching most embroidery beds to their machines they will make a loud click sound. Do not be alarmed for this is a natural occurrence in their species, although alarming at first.
Now that we have our whole machine together we can find our power cord and wind our first embroidery bobbin. This bobbin will be, for most embroidery projects, different than the other sewing projects you may be used to. The embroidery machines use a special fine polyester back thread. The embroidery patterns and machines are adjusted to account for this embroidery bobbin thread weight. This means it is important to use this thread to get the best possible results out of your designs.
Knowing Your Embroidery Stabilizers
The next thing you will notice is the hoop part of your set as well as a piece of stabilizer. These are the key to a perfect result. If you do not have your piece hooped and stabilized correctly all hope is lost.
There are many different kinds of stabilizers
Choosing the right stabilizer depends upon the intent for the project.
For example, if you would like to make some His and Hers bath towels for the newlyweds present you will not only need to stabilize the back, with what I would recommend is a medium weight ripaway, but we also should consider the top. On towels especially you need note the loft or height of the terry cloth, the fluffier the towels the harder it is to prevent the little terry cloth pokers to come through your design. There are a few things we can do here for prevention. One is using a proper design for a towel, as in a wide thick satin stitched design, and we can use a top stabilizer that is water soluble. This will hold down all of that terry texture while the machine stitches to ensure a nice clean pattern every time.
So know your stabilizers!
Embroidery Hoops
The next is the hoop in general.
This is a two-part hoop with a screw key on one half. This is where we will sandwich our stabilizer and material, creating a nice drum tight base on which our machine will stitch.
Hooping is an art in itself. You have to hoop so the material is tight, bubble free, and positioned perfectly so the design will be correctly aligned. This will come with a little trial and error. It can also come with the help on a few really great tools and techniques that can be a real time and sanity saver for many of us.
One is the shirt pocket placers. If you run a business where embroidering in pockets in large quantities of the same logo in the same place straight every time, then I highly recommend using one of those systems to ensure a quality control. Not if you are just doing the occasional baby blanket or napkin, chalk or marking is the answer. With a few hacks of mine for hooping hard or difficult items you will be cranking out the patterns in no time.
Embroidery Thread
One of the most important elements to your embroidery success is your thread choice. Most embroidery threads are silky in nature. They come with luster, sometimes even variegation, sparkle, or even metallic in the threads. This allows the artist choice in depth and texture for the piece they are looking to create.
There are many brands of thread on the market and choosing one again will depend on the project and look you are trying to achieve. However, a few basic words of wisdom to remember.
First, a high-quality thread will leave you and your machine happy and working well for years. The higher the thread quality the less physical wear and tear it will do to your machine. Second, don’t overuse the speciality threads. The “cools kids on the block” of threads maybe extra shiny or fuzzy and will give your pattern some great depth, however many of these can leave behind residue and even mar the machine if used often. The metallic threads that are almost like small spoils of tinsel do a number of the metal of machines leaving grooves that can rip at other, more delicate thread on later projects so beware when using these to slow the machines stitched per min.
Embroidery Needles
The needle is the last physical part of the machine to cover. This is the main element to a good design. If you do not have a good sharp needle before a large, intricate, or thick design the result will, I promise, be less than perfect. So sharp needles are the troubleshooting ace in the hole to your embroidery success.
Now on to some other variables in our stitching endeavours.
What is our design and what are we stitching on?
These two can be the hardest to address for most teachers and experts as it truly is a matter of being a sewing scientist. Trial and error. Experiment after experiment. Being able to run each pattern you receive to make sure it stitched nicely with no hiccups.
Starting with
Well, this also depends on the goal of the project. However, here are a few pointers about how to choose wisely. First, if you are a beginner, when choosing your design go with a pro. What I mean by a pro is a trusted source. Sometimes I will see deals on different sites but one example is Etsy. You have many artists who say they can get you a design for next to nothing and you may know why it was so cheap. I have also found that the “free” embroidery design CDs they give away on special are normally not worth anything without some editing.
Now being as a beginner, I wouldn’t say that the first step is to acquire some kind of editing software. It may very well be one of the first ten steps if you want to change size of your design, but not required.
Many professionals will tell you that software is a must to do anything you “really want” in embroidery. This is a bunch of baloney. You do not NEED software to begin your world of embroidery. Changing your design to meet your embroidery designs maybe in order. I also have found great fun in making
Choose a few designs to play with and start there.
I recommend a single colored design, a
Begin with the single colored design. Make sure your test material and stabilizer are hopped square and tight.
Thread your machine with our embroidery bobbin thread and an embroidery thread of your choice (I personally like high sheen if I’m only going to use one color).
New needle in place and we are ready to stitch. Load your hoop in to the machine.
Insert your embroidery card or memory stick with your desired design, select the design through your machine, lower the presser foot and stitch away.
Your machine will automatically stop when finished cutting the thread on top and bottom. Remove your hoop from your machine and voila
Now this is the tip of the iceberg for the world of embroidery. One of my favorite uses for my embroidery machine is to make earrings, bracelets and other fun adornments using no fabric at all, simply thread, machine and creativity of course.
The adventure is yours to have, so no matter what you are trying to do with embroidery the sitiching.guide will be here to help!
As always, send us a message suggesting new topics to cover.
Take Care Of Your Body. It’s The Only One You’ve Got.
Lorem ipsum dolor sit amet, consectetur adipiscing elit, sed do eiusmod tempor incididunt ut labore et dolore magna aliqua. Ut enim ad minim veniam, quis nostrud exercitation ullamco laboris nisi ut aliquip ex ea commodo consequat. Duis aute irure dolor in reprehenderit in voluptate velit esse cillum.
4-Week Fitness Plan: A Guide to Breakfast, Lunch & Dinner
Our Blog
15 Types of Sewing Machine Needles: The Comprehensive Guide.
No matter if you have just got your first sewing machine or you are a long time quilting pro we all use needles in our creating career. Yet some of us that use needles regularly are often baffled at the vast variety on the wall in front of us at the fabric stores....
Marking
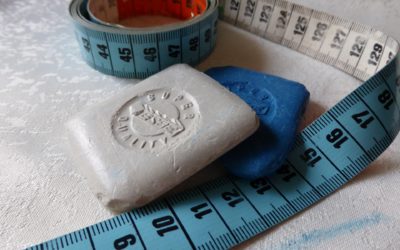
Marking tools come in a variety of different colors and materials. As I teacher I know it can all be confusing for a first time stitcher. Never fear! I will show you which of the marking tools is proper for your project depending materials. [easyazon_link...
Quilt Piecing 101
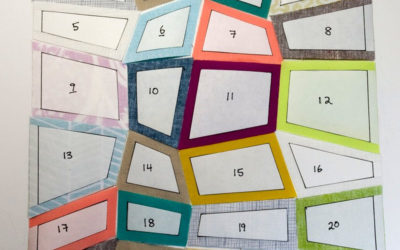
Quilt piecing can be the most rewarding and yet challenging part when starting your quilt. Now that you have your design chosen and your pieces cut you are ready to start. For this blog I will be using a squares pattern for reference, like a checkerboard quilt. The...
Featured In


